Using the Google Maps Javascript API
Having final updated some map examples I had to version 3 of the Google Maps Javascript API, I ran into a few problems with the way InfoWindows had changed and as I searched for solutions, it seems many people are having problems with this part of the API.
In version 3 there was a move towards simplification, reducing in some instances what Google Maps did for you; most of these changes were seem to be around simplifying the API to make it lightweight for mobile devices. However, because of these changes you now need to do a little extra work yourself.
On the other hand, you no longer need an API key to use the scripts, which is a really nice change.
Below, I generated a few simple examples showing how to use the API and especially how to handle markers and their infowindows (the little popup quote bubbles common on Google Maps).
A Simple Marker Example
Lets look at the simplest example of adding a marker to a map (this is based on http://code.google.com/apis/maps/documentation/javascript/examples/marker-simple.html):
First we include the new Javascript API in the header (no API key required which is great):
<script type="text/javascript" src="http://maps.googleapis.com/maps/api/js?sensor=false"></script>
Then we set our HTML to call a Javascript function, initialize to handle the map, along with setting up a div element into which we want to draw our map. In this example, we setting the div id to be map_canvas. Note the CSS styling of height and width is just there to constrain the size of the map we’re drawing.
<body onload="initialize()">
<div id="map_canvas" style="width: 450px; height: 450px;"></div>
</body>
And now the fun part, here is the initialize function which we use to set-up our map:
function initialize() {
    var myLatlng = new google.maps.LatLng(-0.09516,34.74733);

    var myOptions = {
        zoom: 10,
        center: myLatlng,
        mapTypeId: google.maps.MapTypeId.TERRAIN
    }

    var myMap = new google.maps.Map(document.getElementById("map_canvas"), myOptions);

    var myMarker = new google.maps.Marker({
        position: myLatlng,
        map: myMap,
        title:"Hello there Kisumu!"
    });
}
This is broken down into four key components:
- A geographical data point (myLatLng), which is a LatLng object.
- We want to point to a given place on the globe, in this case Kisumu, Kenya
- Options for the map we want to display (myOptions), which is based on the MapOptions object.
- There are plenty of options to set, but these are the required options. Zoom controls the zoom level of the map, the larger the number the closer in the map is zoomed. Center sets the center point of the map, in this case we’re using the latlng point we created. MapTypeId sets the map type, which can be one of: HYBRID (overlay of streets onto satelite images), ROADMAP (the more common street map view), SATELLITE (the Google Earth view) or TERRAIN (shows terrain and vegetation).
- The Map itself (myMap), a Map object.
- We create a map object, telling it where to draw itself via the id we set (map_canvas) in the div in the HTML and we give the map the options we set-up.
- A display marker (myMarker), a Marker object.
- Finally we create a simple marker telling it to point at our LatLng point on our map and with a given tooltip title. If you place the cursor over the point, you can see the title appear.
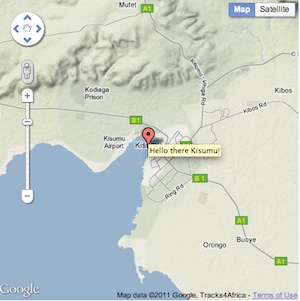
This will create a map like this:

You can check out the map here: examples/maps/simple_map.html. Show the source in your browser to see how it ties together. Feel free to make a copy and start playing around.
Adding an InfoWindow
In the previous example we have a map but this map is not very exciting. Typically, people want to be able to click on the points we’ve marked and show some extra information. This is done via Maps’ InfoWindow object, which handles the pop-up quote window common on Google Maps.
First, lets create a new InfoWindow object, like so:
    var myContentString = "<div id='pop_up'><h2>Kisumu, Kenya</h2><p>Kisumu is Kenya's 3rd largest city</p></div>";

    var myInfowindow = new google.maps.InfoWindow({
        content: myContentString;
    });
Notice that the content of an InfoWindow can be HTML so you can style it, format it, include images, provide links etc to really have some rich data in there. Note: there is a max size for this content, so don’t include too much.
Next, we attach a listener to our marker (myMarker) to open this infowindow when the marker is clicked:
google.maps.event.addListener(marker, 'click', function() {
    myInfowindow.open(myMap,myMarker);
});
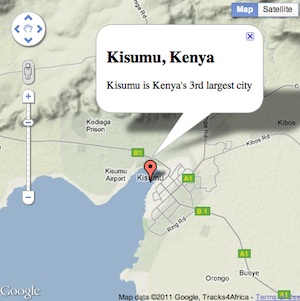
This gives a map with a nice InfoWindow:

You can check this out here: examples/maps/simple_map2.html
You may noticed that clicking on the marker brings up the InfoWindow popup but you have to click on the InfoWindow close box to close it. We could also change our click handler to automatically close the window if we click on the marker, using this code:
if (myInfowindow.getMap()) {
    myInfowindow.close();
}
else {
    myInfowindow.open(myMap,myMarker);
}
That call to getMap will only succeed if the InfoWindow is open. There may be a better way to do this but so far this is the most reliable method I’ve found.
Adding Multiple Markers with InfoWindows
There is some confusion about how to handle multiple markers and InfoWindows. In the old API there was only ever one InfoWindow and you had a global array of markers to hand to query. In the new v3 API things are little more complex.
So there seems to be two ways to do this: multiple markers & multiple infowindows or multiple markers & a single infowindow.
Multiple Markers & Multiple InfoWindows
We’re going to load our markers out of a static array to keep things simple. However, you can easily load out of an XML, KML or other file. Theres examples of loading out of an XML file here: http://www.tinyblueplanet.com/maps.
First we’ll define some markers, giving the latitude and longitude, a title string and some info window contents.
var locations = [
    [-0.09516,34.74733, 'Point 1', '<p>This is Point 1</p>'],
    [-0.09526,34.75733, 'Point 2', '<p>This is Point 2</p>'],
    [-0.09506,34.73733, 'Point 3', '<p>This is Point 3</p>']
];
Then we’ll iterate over the markers and add them to our map, using a new setmarker function:
function setmarker(myMap, lat, lng, title, content) {
    var markerLatlng = new google.maps.LatLng(lat, lng);

    var myMarker = new google.maps.Marker({
        position: markerLatlng,
        map: myMap,
        title: title
    });

    var myInfowindow = new google.maps.InfoWindow({
        content: content
    });

    google.maps.event.addListener(myMarker, 'click', function() {
        if (myInfowindow.getMap()) {
            myInfowindow.close();
        } else {
            myInfowindow.open(myMap, myMarker);
        }
    });
}
Theres not a lot new here, we turn our lat & lng information into a LatLng object, create a marker for it, we then create a new info window object and use it in the click listener for the marker.
However, because we have multiple markers we are also creating multiple info windows; one on each call to the setmarker function. Each marker is then associated with each infowindow when we create the callback click listener.
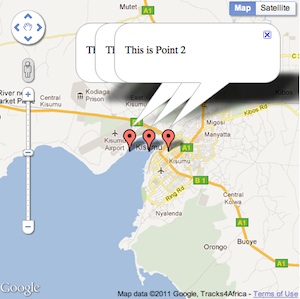
You can see this in the example as InfoWindows will remain open until you close them:

You can play with this example here: examples/maps/simple_map3.html
Multiple Markers and a Single Info Window
Finally, we’ll look at how to achieve the old style of InfoWindows, where you had just a single window, which involves a little more effort.
First we move creation of the InfoWindow out of the setMarker function and just create a single empty one:
var myInfowindow = new google.maps.InfoWindow();
Next we change the setmarker function as follows:
function setmarker(myMap, myInfowindow, locationId, lat, lng, title) {
    var markerLatlng = new google.maps.LatLng(lat, lng);

    var myMarker = new google.maps.Marker({
        position: markerLatlng,
        map: myMap,
        title: title
    });

    google.maps.event.addListener(myMarker, 'click', (function(myMarker, locationId) {
        return function() {
            myInfowindow.setContent(locations[locationId][3]);
            myInfowindow.open(myMap, myMarker);
        }
    })(myMarker, locationId));
}
This code was quickly written so please allow me some flunkiness here (we could obviously clean up that parameter list for a start).
Basically we now pass our sole InfoWindow (myInfowindow) into the setmarker function along with the id (locationid) in the locations array. For simplicity we’ve moved the locations array outside of the initalize function so it can be found in the click callback, obviously that could be cleaned up to.
We now create a slightly different click callback, bound to our marker and the id of the location in the locations array. When the click is called, we associate the content of the correct marker (via the locationId) to the infowindow and then call to open the infowindow on the map associated with our marker.
Volia…

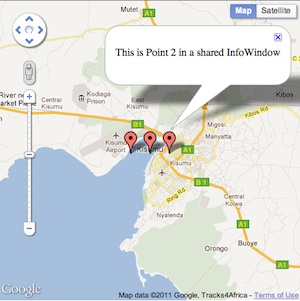
You can play with this example here examples/maps/simple_map4.html
What Next?
- Find map examples you like and look at the Javascript via ShowSource in your browser. YOu can quickly figure out how people are using the API this way.
- Try changing the default pin marker icon to something else. There are lots of options here (see MarkerImage and the Marker options).
- Use Google Earth to make polygon shapes for your map (to show an area rather than a point)and more 3D displays on maps.
- Use Google Fusion Tables to mash-up data to overlay geo data and other data.
Recent Comments